DKS ServiceWorks DKS ServiceWorks

Why and How to Extend the Life of Drill Bits?

Time:2026-09-12 Author:Aria
0%

Drill bits rarely fail without warning. Their cutting edges dull gradually, heat builds inside the hole, and vibration leaves small marks on the shank. Learning how to extend the life of drill bits protects production time, reduces replacement costs, and improves hole quality. It also requires more than choosing a harder bit.

Drilling engineer Bill Rehm has emphasized a practical principle: “The right bit must match the formation, the machine, and the operating conditions.” That idea remains highly relevant on busy job sites. A bit designed for soft wood may burn quickly in abrasive concrete. A masonry bit can chip when excessive pressure meets hidden steel. Matching the bit to the material is essential.

Operator habits matter just as much. Use the recommended speed, maintain steady pressure, and clear dust from the hole. Let the bit cut. Do not force it. Overheating often appears as blue discoloration, a sharp burnt smell, or weakened edges. These signs should not be ignored.

Cleaning and storage also influence service life. Wipe bits after use, inspect the tip under good light, and store them separately from loose metal tools. A damaged edge can worsen during the next job. In practice, not every recommendation works perfectly. Machine power, operator technique, and material variation can change results. That uncertainty deserves attention.

The most reliable approach combines manufacturer guidance, inspection records, and field experience. Track drilling speed, temperature, material, and failure symptoms. Small notes can reveal expensive patterns. Extending drill bit life is not a single trick; it is a disciplined process that improves through careful observation.
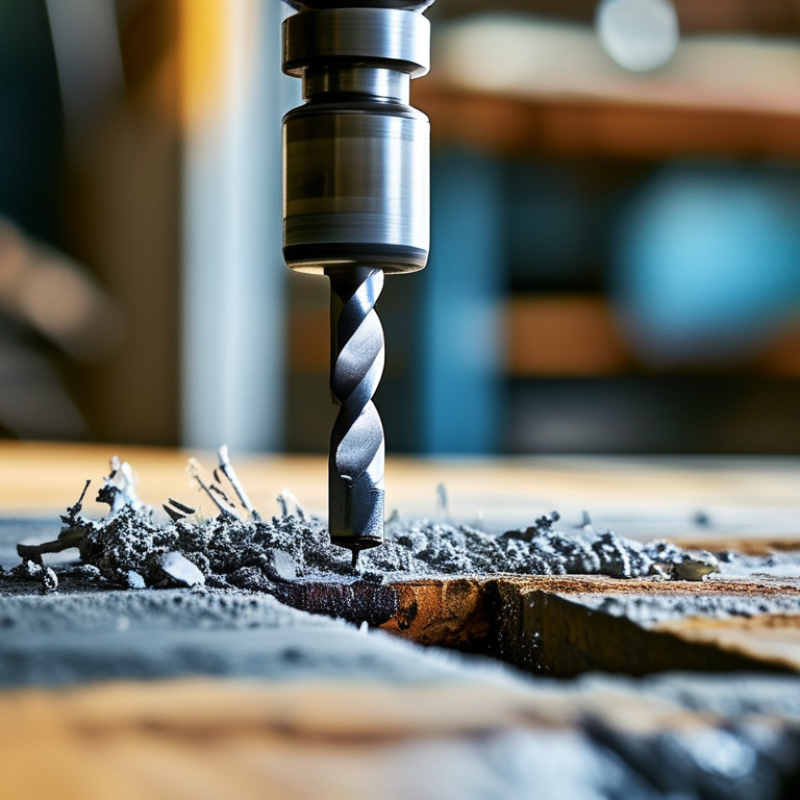
Why and How to Extend the Life of Drill Bits?

What Determines the Service Life of a Drill Bit?

A drill bit’s service life depends on several interacting variables, not one advertised number. Material hardness matters, but abrasiveness can matter more. The U.S. Geological Survey’s Mineral Commodity Summaries 2024 placed U.S. industrial sand output near 100 million metric tons in 2023. Silica-rich dust can quickly polish cutting edges and clog flutes.

Cutting speed, feed pressure, cooling, and machine alignment also determine wear. Excessive speed creates heat at the tip. Low feed can cause rubbing instead of cutting. Poor chip removal leaves bright, spiral scratches inside the hole. ISO 8688-2 evaluates drilling tool life using defined wear limits; a 0.3-millimeter flank-wear value is commonly used in controlled testing. Real workshops are less predictable. That matters.

Runout is another hidden factor. Even 0.05 millimeters of eccentricity can load one cutting edge more heavily than the other. Operators should record hole count, material grade, cycle time, and visible edge wear. Comparing these records reveals whether failure comes from geometry, cooling, or operator technique. A 2023 review in the Journal of Materials Research and Technology linked temperature and abrasive wear with faster tool degradation in metal cutting. The exact rate still varies widely.

I have seen teams replace bits by calendar age. That is convenient, but often wrong. A bit used gently in clean aluminum may outlast one drilling abrasive composite panels. Inspect the tip after each shift. Measure it, rather than trusting appearance alone.

How to Select the Right Drill Bit for Each Material

Choosing the right drill bit begins with identifying the material, not the hole size. Wood responds well to brad-point bits, which reduce wandering and leave cleaner entry holes. Masonry requires a carbide-tipped bit and steady pressure. For steel, use a sharp high-speed steel bit with cutting fluid to control heat. Glass and ceramic tile need specialized spear-point or diamond-coated bits, plus water cooling.

A bit can look suitable and still fail. In workshop practice, excessive speed often burns wood and softens metal edges. Use moderate speed on metal, firm alignment, and light pressure as the bit exits. A pilot hole helps prevent wandering, especially in thin sheet metal. Plastic needs a sharp bit, slow rotation, and frequent pauses. Otherwise, the material may melt around the hole.

Bit life also depends on small habits. Wipe away chips after each hole, inspect the cutting edges, and store bits separately to prevent contact damage. Do not force a dull bit; heat will increase quickly. Some steel bits can be resharpened, but cracked carbide tips should be replaced. I have sometimes chosen a bit by diameter alone, and that was poor judgment. The workpiece, coating, thickness, and drilling speed matter just as much. A clean hole is useful evidence that the bit choice was correct.

How to Use Drilling Techniques That Reduce Bit Wear

Extending drill-bit life begins with controlling the drilling process, not simply buying a harder bit. The U.S. Department of Energy reports that drilling and well construction can represent 30–50% of geothermal project costs. Small improvements in bit durability can therefore affect the entire project budget. Experienced crews watch weight on bit, rotary speed, torque, and vibration continuously. Stable inputs matter.

Avoid sudden changes.

Excessive weight on bit can crush cutters or overload roller bearings. Excessive rotary speed can create heat, especially in abrasive formations. Adjust both parameters gradually when the formation changes. Maintain sufficient drilling-fluid flow to clean the cutters and carry rock away. Poor cleaning leaves a compacted layer beneath the bit, which increases friction and reduces penetration. API drilling guidance also emphasizes suitable hydraulics, equipment condition, and controlled operating parameters.

Watch the torque trend. A sharp rise may indicate balling, poor cleaning, or an unstable bottom hole. Stop and investigate before damage spreads. During connections, avoid aggressive reaming unless the hole condition requires it. Repeated impact can weaken cutting structures. At each trip, inspect cutter wear, broken teeth, bearing condition, and gauge loss. The IADC dull-grade system provides a consistent language for recording these observations and improving future bit selection.

Not every wear pattern has one cause. My practical view is sometimes incomplete. Formation changes, poor alignment, and inaccurate surface measurements can look similar. Record footage, drilling time, operating data, and dull characteristics together. That evidence supports better decisions than intuition alone.

Why and How to Extend the Life of Drill Bits? - How to Use Drilling Techniques That Reduce Bit Wear
Wear-Control Dimension Recommended Drilling Practice Practical Operating Guidance How It Reduces Bit Wear What to Monitor Common Risk if Ignored
Weight on Bit (WOB) Apply only the WOB needed to maintain efficient cutting; avoid sudden loading. Increase WOB gradually while observing penetration rate, vibration, torque, and motor or rig load. Prevents excessive tooth, button, cutter, bearing, and body stress caused by overloading. Penetration rate, torque, vibration, hydraulic pressure, and bit response. Overloading can cause cutter breakage, cone damage, bearing failure, or accelerated gauge wear.
Rotational Speed Use a rotation speed suitable for the bit design, rock strength, formation abrasiveness, and drilling method. Reduce speed when vibration, excessive heat, balling, or abnormal torque develops. Limits frictional heat, abrasive sliding, and dynamic impact between the bit and formation. RPM, torque fluctuations, vibration, temperature, and penetration consistency. Excessive RPM may increase thermal damage, cutter wear, whirl, and premature bit failure.
Feed and Pullback Control Maintain a smooth feed rate and avoid aggressive contact with the bottom of the hole. Use controlled acceleration and deceleration, especially when entering fractured or changing formations. Reduces impact loading and prevents the bit from repeatedly striking uneven surfaces. Feed pressure, pullback force, vibration, and changes in penetration rate. Shock loading may chip carbide buttons, damage PDC cutters, or deform bit components.
Flushing and Cooling Provide sufficient air, water, or drilling fluid flow to remove cuttings and cool the cutting structure. Keep the fluid path clear and verify that pressure and flow remain stable throughout drilling. Prevents recutting of abrasive chips, reduces bit balling, and removes heat from the cutting zone. Flow rate, fluid pressure, return quality, cuttings removal, and fluid temperature. Poor circulation can cause overheating, clogged waterways, reduced penetration, and rapid wear.
Cuttings Removal Maintain enough annular velocity or air volume to transport cuttings out of the hole. Pause or adjust drilling when returns become weak, cuttings accumulate, or the hole begins to pack off. Stops abrasive cuttings from remaining between the bit and the formation and being crushed repeatedly. Return flow, cuttings size, discharge condition, and signs of regrinding. Poor hole cleaning increases torque, heat, bit balling, and abrasive wear.
Drilling Fluid Quality Use fluid properties appropriate for the formation and equipment, including suitable viscosity and solids control. Remove harmful solids when required and prevent contamination that restricts nozzles or waterways. Improves lubrication, cooling, hydraulic cleaning, and protection against abrasive solids. Viscosity, density, solids content, filtration behavior, and fluid temperature. Excessive solids or unsuitable fluid properties can increase abrasion, plugging, and hydraulic losses.
Formation and Bit Matching Select a bit and cutting structure suited to rock strength, abrasiveness, fracturing, and drilling conditions. Use suitable tooth, button, cutter, matrix, or body characteristics for the expected formation. Reduces inefficient crushing, cutter overload, tooth breakage, and unnecessary wear on the bit body. Rock strength, abrasiveness, fracture frequency, penetration rate, and wear pattern. A poorly matched bit may suffer rapid gauge loss, cutter damage, balling, or low productivity.
Vibration and Whirl Control Operate with balanced WOB, RPM, and feed settings; stop and correct abnormal vibration promptly. Check alignment, stabilization, drill-string condition, and operating parameters when vibration rises. Reduces repeated impact and uneven loading on cutters, bearings, threads, and the bit gauge. Axial, lateral, and torsional vibration; torque spikes; noise; and irregular penetration. Uncontrolled vibration can produce uneven wear, broken cutters, connection damage, and fatigue failure.
Straightness and Alignment Keep the drill string, mast, guides, and hole path properly aligned. Inspect guides, stabilizers, connections, and the hole condition before continuing after deviation. Prevents side loading, gauge rubbing, eccentric wear, and bending stress on the bit and drill string. Hole deviation, gauge diameter, stabilizer condition, and side-force indicators. Misalignment may cause uneven gauge wear, stuck tools, connection fatigue, and hole deviation.
Controlled Tripping and Re-entry Lift, lower, and re-enter the hole smoothly; avoid forcing the bit through ledges or tight spots. Circulate when needed, clean the hole, and investigate resistance instead of applying excessive force. Protects the cutting structure and gauge from impact against ledges, collapsed zones, and debris. Pullback force, re-entry resistance, torque, drag, and hole-cleaning condition. Forced re-entry can chip cutters, damage the gauge, bend components, or lead to a stuck bit.
Routine Bit Inspection Inspect the bit at planned intervals and after any sudden change in drilling behavior. Record cutter or button loss, gauge condition, erosion, cracking, bearing condition, and nozzle blockage. Early detection allows parameter correction or maintenance before minor wear becomes catastrophic damage. Wear-flat size, missing cutters or buttons, gauge loss, cracks, erosion, and nozzle condition. Continuing with a damaged bit can reduce drilling efficiency and damage other downhole components.
Parameter Optimization Adjust WOB, RPM, feed, and flushing together rather than changing one parameter without checking the others. Use drilling records to identify the operating range that provides stable penetration with acceptable vibration and torque. Balances cutting efficiency, heat generation, hydraulic cleaning, and mechanical loading. Specific energy, penetration rate, torque, vibration, fluid flow, and wear progression. Unbalanced parameters may increase energy consumption, reduce productivity, and shorten bit life.
Important: The correct operating parameters depend on bit type, diameter, drilling method, equipment capability, formation properties, and manufacturer or site safety procedures. Use this table as a practical framework and confirm final settings through controlled field testing and inspection.

How to Clean, Cool, and Maintain Drill Bits Properly

Drill bits last longer when heat, friction, and metal chips stay under control. Cleaning and cooling are not minor workshop habits. They directly affect cutting accuracy, edge strength, and tool life.

After drilling, stop the machine and let the bit slow completely. Remove packed chips with a stiff brush, not bare fingers. A small brush reaches the spiral flutes well. Compressed air can help, but direct it away from your face and nearby workers. Wipe the bit with a dry cloth, then inspect the cutting edges under good light. Look for blue discoloration, rounded corners, cracks, or uneven wear. Blue marks often signal excessive heat. That bit may still cut, but its hardness could already be reduced.

During drilling, apply the correct cutting fluid for the material and bit type. Use short drilling cycles in thick metal, lifting the bit to clear chips. This reduces friction and gives coolant a path into the hole. Do not pour cold water onto a glowing bit. Sudden temperature changes can damage some tools and may create dangerous steam. I once ignored this step, and the bit looked fine until the next hole wandered badly. That mistake was expensive.

Store clean, dry bits in separate slots or a protected case. Lightly protect suitable steel surfaces from rust, but keep oil away from the cutting edges before use. Check the bit before every job. Small damage becomes costly quickly.

When to Repair, Reuse, or Replace a Drill Bit

Why and How to Extend the Life of Drill Bits?

When to Repair, Reuse, or Replace a Drill Bit

A drill bit should be inspected before and after demanding work. Look for chipped edges, blue discoloration, bent shanks, and uneven wear. These signs reveal heat, poor alignment, or excessive pressure. In workshop practice, cleaning the flutes after each job prevents trapped chips from damaging the cutting edge. A small brush and dry storage can make a noticeable difference.

Repair makes sense when the damage is limited. A qualified technician can resharpen a dull edge and restore its geometry. This option suits bits with good alignment, intact flutes, and no visible cracks. Do not judge only by appearance. A bit may look acceptable but cut poorly because its point angle has changed. I have reused bits too soon before, and the rough holes were a clear warning.

Reuse a bit when it cuts smoothly, runs straight, and produces consistent hole sizes. Test it on scrap material first. Replace it when the bit is cracked, badly overheated, bent, or repeatedly loses its edge. A damaged bit can wander, waste material, and increase hand pressure. That risk is rarely worth saving a small tool. Match the bit to the material, use suitable speed, and avoid forcing the cut. Sometimes replacement is the more economical repair.

Why and How to Extend the Life of Drill Bits?

Use flank-wear condition, cutting performance, and visible damage to decide whether a drill bit should be reused, repaired, or replaced.

Reuse a clean bit when wear is minor and holes remain within tolerance. Repair or regrind the bit when flank wear is moderate but the geometry is still recoverable. Replace it when wear exceeds the acceptable limit or when cracks, chipping, overheating, or severe diameter loss are present. Exact limits depend on bit material, workpiece, and cutting conditions.

FAQS

How should I choose a drill bit for wood?

Use a brad-point bit for cleaner entry holes. It helps prevent wandering. Use moderate speed to avoid burning the wood.

Which drill bit suits masonry?

Choose a carbide-tipped bit and apply steady pressure. Keep the drill aligned with the surface. Do not force a dull bit.

How can I drill steel without overheating the bit?

Use a sharp high-speed steel bit with cutting fluid. Select a moderate speed and light pressure. A pilot hole helps with thin sheet metal.

What type of bit works for glass or ceramic tile?

Use a spear-point or diamond-coated bit. Apply water cooling during drilling. Work slowly and keep the bit stable.

How do I prevent plastic from melting around the hole?

Use a sharp bit at slow rotation. Pause often to let the material cool. The hole may still need cleanup.

What signs show that a drill bit needs inspection?

Check for chipped edges, blue discoloration, bent shanks, and uneven wear. These signs often indicate heat or poor alignment. Clean the flutes after demanding work.

When can a drill bit be repaired or resharpened?

Repair may suit a dull bit with intact flutes and good alignment. A qualified technician should restore its cutting geometry. Appearance alone can mislead.

When should I replace a drill bit instead of reusing it?

Replace it when it is cracked, badly overheated, bent, or repeatedly dull. Test reusable bits on scrap material first. I have reused bits too soon. Rough holes were the warning.

Conclusion

Extending the service life of a drill bit depends on several factors, including the bit’s material, cutting design, hardness, and the type of work it performs. Choosing the right bit for wood, metal, masonry, plastic, or composite materials helps prevent overheating, premature dulling, and unnecessary breakage. Matching the bit size and cutting speed to the task is equally important, especially when working with hard or abrasive surfaces.

Learning how to extend the life of drill bits also requires proper drilling technique and regular care. Apply steady pressure, avoid forcing the bit, and use suitable cooling or lubrication when heat builds up. After use, remove dust and chips, dry the bit thoroughly, and store it in a clean, protected place. Inspect cutting edges and shanks regularly to determine whether a bit can be sharpened, reused, or should be replaced. Timely maintenance improves accuracy, safety, and overall tool efficiency.

Aria

Aria

Aria is a dedicated marketing professional with a deep passion for innovative strategies and a keen understanding of our company's product offerings. With a wealth of experience in the industry, Aria excels at crafting engaging content that highlights the unique features and benefits of our......