DKS ServiceWorks DKS ServiceWorks

2026 Top Guide What Are the Signs of Worn Out Drill Bits?

Time:2026-10-17 Author:Ethan
0%

Drill bits rarely fail without warning. The real question is, what are the signs of worn out drill bits before accuracy, safety, and production speed decline? In a busy workshop, the clues may appear as squealing, rising spindle load, rough hole walls, or a thin blue band near the cutting edge. A bit that once produced clean chips may suddenly create powder, long stringers, or excessive heat. Small changes matter.

ISO 8688-2, the international standard for drilling tool-life testing, identifies flank wear, chipping, crater wear, and catastrophic edge failure as important evaluation points. Kennametal’s drilling application guidance also links poor chip control, excessive torque, and unstable cutting conditions with tool damage. Sandvik Coromant’s technical recommendations emphasize checking cutting data, coolant delivery, and edge condition together, rather than judging wear by appearance alone. That distinction is practical. A shiny edge is not always a healthy edge.

Experienced operators often compare a new hole with a recent production sample. They inspect diameter, roundness, burr height, sound, and chip shape. However, visual checks can mislead, especially with coated carbide tools. I have seen bits continue cutting while quietly increasing machine load. That is the uncomfortable part: waiting for obvious failure is already too late. This guide explains the measurable and visible symptoms of worn drill bits, while acknowledging that material, coating, feed rate, and machine rigidity can change the diagnosis. Use manufacturer limits and documented inspections before replacing or continuing a tool.
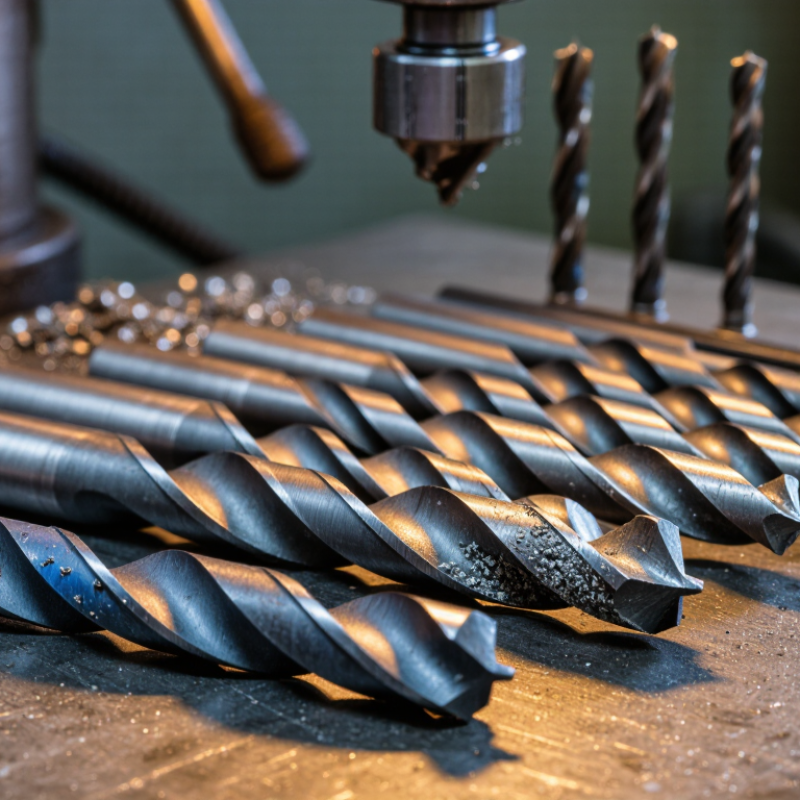
2026 Top Guide What Are the Signs of Worn Out Drill Bits?

What Are Worn-Out Drill Bits?

Worn-out drill bits are cutting tools that no longer remove material cleanly. Their edges become rounded, chipped, or overheated. The bit may look usable, but its cutting geometry has changed. A dull bit often creates fine dust instead of steady chips. It also needs more downward pressure. That extra force is a warning.

Watch the hole, not only the bit. A worn bit may wander during entry, leave a rough surface, or produce an oversized hole. Dark blue or brown marks show excessive heat. Squealing sounds and repeated binding are also common. In practical workshop checks, compare the cutting lips under bright light. Unequal lips reveal uneven wear. I sometimes miss small edge chips without magnification. That mistake matters.

The U.S. Bureau of Labor Statistics reported 2.6 million nonfatal workplace injuries and illnesses in private industry during 2023. The report does not isolate drill-bit failures, but it reinforces the need to control force and heat. OSHA guidance also emphasizes guarding, stable workpieces, and proper tool selection. A worn bit can increase all three risks. Replace it when sharpening cannot restore equal edges. Do not rely on appearance alone. Measure hole quality, cutting effort, heat, and vibration together.

How to Recognize Common Signs of Drill Bit Wear

Worn drill bits rarely fail without warning. In my workshop experience, the earliest sign is slower cutting. A bit that once entered wood smoothly may now squeal, wander, or produce dusty fragments. In metal, you may notice blue discoloration near the tip. That color often indicates excessive heat and weakened cutting edges.

Look closely under strong light. Rounded lips, chipped corners, uneven flutes, and a blunt point all suggest wear. A twist bit should have symmetrical cutting edges. If one edge looks shorter, the hole may become oversized or angled. Excessive vibration is another warning sign, especially when the drill is held steadily. The bit may also leave rough exits, burn marks, or a ragged hole instead of a clean opening.

Check the result, not only the appearance. Compare drilling time, required pressure, and surface quality with a new or known-good bit. A worn bit usually needs more force, which increases heat and can damage the material. Stop and inspect it if the shank slips or the tip sparks. That matters.

I once blamed a dull bit for poor performance, but the real problem was an unstable workpiece. This is easy to miss. Clean the bit, secure the material, and confirm the correct speed before replacing it. If wear remains visible after cleaning, continued use is usually poor practice. Proper storage, suitable speed, and occasional inspection can extend useful life, though no bit stays sharp forever.

2026 Top Guide: What Are the Signs of Worn-Out Drill Bits?

Flank wear land, measured as VB in millimeters, is a widely used indicator of drill-bit wear. A growing VB value is commonly associated with slower cutting, higher cutting force, heat buildup, poor hole quality, and visible edge damage. The values shown are general engineering reference levels; actual replacement limits depend on the drill material, workpiece, cutting speed, feed rate, and coolant conditions.

Why Drill Bits Become Damaged or Dull

2026 Top Guide: What Are the Signs of Worn-Out Drill Bits?

Why Drill Bits Become Damaged or Dull

A worn drill bit often leaves a shiny, rounded cutting edge. The hole may become oversized, rough, or slightly conical. You may also notice squealing, vibration, smoke, or unusual feeding pressure. Stop and inspect the bit. Continuing can overheat the tip and damage the workpiece.

Heat is a common cause of failure. Excessive speed, weak lubrication, and packed chips prevent proper cooling. Hard materials can also create crater wear along the cutting face. ISO 8688-2 identifies flank wear, crater wear, and edge chipping as measurable tool-life indicators. Industry tool-life studies commonly record these changes in millimetres, not by appearance alone. That matters. Visual judgment can be inconsistent.

A drill bit can fail early because of misalignment, poor clamping, or repeated impact loading. A blunt point needs more force, which increases heat and deflection. Sometimes the operator is the problem. Sometimes the cutting data is wrong.

Tips

Check the edge under bright light before each job. Use a small ruler or magnifier to compare wear. Keep the bit aligned with the surface. Match speed and feed to the material. Clear chips frequently, especially in deep holes. If blue discoloration appears, replace or recondition the bit. Do not wait for complete failure.

2026 Top Guide: What Are the Signs of Worn Out Drill Bits? - Why Drill Bits Become Damaged or Dull

Inspection Dimension Typical Sign Likely Cause Risk or Effect Recommended Action Condition Level
Cutting edges Edges look rounded, chipped, or visibly thinner than before. Normal abrasive wear, excessive feed pressure, or unsuitable cutting speed. Poor cutting performance, larger burrs, and increased heat. Stop using the bit for precision work; sharpen only if the bit is designed to be resharpened, otherwise replace it. Inspect soon
Tip condition The point is fractured, flattened, burned, or no longer centered. Impact, excessive heat, hard inclusions in the workpiece, or tool misalignment. Oversized or wandering holes and possible bit breakage. Replace the bit. Check chuck condition, alignment, and the workpiece for obstructions. Replace now
Hole quality Holes are rough, tapered, oversized, or positioned inaccurately. Dull cutting edges, runout, unstable workholding, or excessive lateral movement. Poor fit for fasteners and reduced surface quality. Verify the bit, chuck, and workpiece setup; replace the bit if the defect follows the tool. Quality warning
Heat and discoloration The bit becomes unusually hot or shows blue, brown, or black discoloration. Excessive friction, low cooling, incorrect speed, or a dull edge. Loss of hardness, faster wear, and possible workpiece damage. Stop and allow the tool to cool naturally. Do not quench a hot bit; correct speed, feed, and lubrication. High risk
Vibration and noise The tool chatters, vibrates, squeals, or produces an intermittent cutting sound. Bent shank, runout, loose chuck, poor workholding, or damaged cutting edges. Unstable holes, edge chipping, premature tool failure, and safety hazards. Stop the machine and inspect the shank, chuck, spindle, and workholding before continuing. Stop and inspect
Cutting time The bit takes longer to penetrate or requires noticeably more pressure. Progressive dulling, wrong cutting parameters, or an unsuitable bit geometry. Lower productivity, excess heat, and operator fatigue. Compare performance with a known-good bit and review the recommended speed and feed for the material. Likely worn
Flute condition Flutes are clogged with chips, packed with material, or visibly cracked. Insufficient chip evacuation, drilling too deeply without clearing chips, or excessive heat. Chip recutting, friction, jamming, and possible fluting failure. Clean only when the machine is stopped. Use pecking or chip-clearing procedures appropriate to the material. Service required
Shank condition The shank is bent, scored, burred, or slips in the chuck. Over-tightening, previous tool impact, poor clamping, or excessive torque. Runout, vibration, inaccurate holes, and possible ejection from the chuck. Replace a bent or damaged bit and inspect the chuck before reuse. Do not use
Surface coating A coating is worn away, flaking, or exposing the base material. Abrasive contact, overheating, chemical exposure, or normal service life. Higher friction and reduced resistance to wear or corrosion. Use the tool only if its cutting edges remain within specification; replace it when performance declines. Monitor
Material compatibility The bit dulls rapidly when used on a hard, abrasive, or heat-sensitive material. Incorrect bit geometry or material grade, excessive speed, or inadequate lubrication. Short tool life, overheating, and inconsistent results. Select a bit designed for the workpiece and follow the applicable cutting-speed, feed, and cooling guidance. Review setup
Storage condition Rust, moisture marks, impact damage, or contact between loose bits is visible. Humidity, contamination, unsuitable storage, or transport impacts. Corrosion, chipped edges, and reduced accuracy before use. Remove heavily corroded or damaged bits. Store clean, dry, and separated in protective holders. Inspect before use
General inspection rule: Always disconnect or stop the drilling equipment before touching, cleaning, measuring, or changing a bit. Replace any bit with cracks, severe chipping, a bent shank, or signs of overheating.

How Worn Drill Bits Affect Drilling Performance

A worn drill bit rarely fails without warning. The tip may look rounded, chipped, glazed, or unusually short. During drilling, watch for slower penetration, rising spindle load, and repeated vibration. A high-pitched squeal can signal rubbing instead of cutting.

The International Association of Drilling Contractors uses an 0–8 dull grading scale to document cutter and bearing wear. Its records help crews compare bit condition with penetration results, rather than relying on appearance alone. Research published in the Journal of Petroleum Science and Engineering also links cutter wear with lower rate of penetration and higher mechanical energy consumption. The effect is practical: a bit that once produced clean, curled chips may create fine dust and heat.

Worn bits also enlarge holes unevenly. They can leave rough walls, increase runout, and make straight drilling difficult. In field work, I check the hole diameter with a gauge and compare current feed pressure with earlier readings. A sudden pressure increase matters. So does a burning smell near the work surface. Yet not every slow hole means the bit is worn; poor cooling, wrong speed, and damaged material can produce similar symptoms. That is where judgment can fail. Record depth, material, speed, pressure, and visible damage before replacing the bit. Small notes often reveal the real pattern.

When to Sharpen, Repair, or Replace a Drill Bit

A worn drill bit rarely fails without warning. The tip squeals, the hole becomes oval, and chips turn powdery. A sharp bit produces short, clean chips and steady cutting pressure. A dull one needs more force, creates heat, and may leave a dark ring around the hole.

ISO 8688-2 uses flank wear as a drilling tool-life measure, with 0.3 mm often treated as a practical wear limit. Use a loupe or a simple caliper, not eyesight alone. Sharpen a high-speed steel bit when the edges remain symmetrical and damage is limited to dull lips. Keep the original point angle. Small errors matter.

Repair is reasonable when the shank is straight, the flutes are clear, and only the cutting edges need grinding. Replace the bit when the tip is cracked, blue from overheating, badly shortened, or visibly bent. A 2023 U.S. Bureau of Labor Statistics report recorded 846,700 nonfatal workplace injuries in private industry; tool control still deserves attention, even when drilling feels routine. Stop the machine before inspection. Obvious, but often missed.

I once judged a bit by appearance alone. It looked usable. The hole proved otherwise. Now I check cutting noise, chip shape, heat, and hole accuracy together. One sign can mislead. Four signs rarely do.

FAQS

What is an early sign that a drill bit is becoming worn?

Slower cutting often appears first. The bit may squeal, wander, or create dusty fragments instead of clean chips. That clue matters.

What does blue discoloration near the tip indicate?

Blue coloring usually shows excessive heat. Heat can weaken the cutting edges and may result from high pressure, poor cooling, or incorrect speed.

Which visible features suggest drill bit wear?

Look for rounded lips, chipped corners, uneven flutes, or a blunt point. Inspect the bit under strong light before drilling.

How can vibration reveal a worn drill bit?

Excessive vibration may occur even when you hold the drill steadily. The bit can produce oversized holes, angled openings, or rough walls.

How does a worn bit affect the drilled hole?

It may enlarge the hole unevenly and leave ragged exits or burn marks. Straight drilling becomes harder, especially in thin materials.

Can slow drilling always be blamed on a worn bit?

No. Poor cooling, incorrect speed, loose material, or damaged workpieces can create similar symptoms. I once blamed the bit incorrectly.

What should be checked before replacing a drill bit?

Clean the bit, secure the workpiece, and confirm the correct speed. Compare drilling time, pressure, hole size, and surface quality.

When should continued use of a drill bit stop?

Stop when the shank slips, the tip sparks, or visible wear remains after cleaning. Continued use may increase heat and material damage.

How can drill bit life be extended?

Use a suitable speed, store bits carefully, and inspect them occasionally. No bit stays sharp forever. That part is easy to forget.

Conclusion

Understanding what are the signs of worn out drill bits is essential for safe, accurate, and efficient drilling. A worn bit may show rounded or chipped cutting edges, visible cracks, discoloration from overheating, reduced sharpness, or unusual vibration during use. It may also produce rough holes, excessive noise, slow progress, or require more pressure than normal. These problems often result from excessive heat, improper speed, heavy force, hard materials, poor storage, or using the wrong bit for a specific task.

Worn drill bits can reduce hole accuracy, damage the workpiece, increase energy use, and create unnecessary safety risks. Minor dullness can often be corrected through proper sharpening, while slightly damaged bits may be repaired if their structure remains sound. However, bits with deep cracks, severe deformation, missing cutting sections, or repeated performance problems should be replaced. Regular inspection, suitable operating conditions, cooling when necessary, and correct storage can help extend drill bit life and maintain reliable drilling performance.

Ethan

Ethan

Ethan is a seasoned marketing professional with a deep expertise in our company's innovative product line. With a passion for sharing knowledge and insights, he takes the lead in regularly updating our corporate blog, where he explores industry trends, product features, and effective marketing......